
This week we took it to one of the garment factories to find out how a piece of clothing is made and what sort of work is put into making your dream design come true. With only a set of paper patterns and a couple of meters of fabric, we visited a big clothing manufacturer from Northern Europe with a goal to gain a full understanding of the process. Let us share it with you:
Without prior knowledge of how the garment manufacturing industry works it can be a bit confusing. People working with clothing factories for the first time are often frustrated with delays, long lead-times or with the lack of flexibility from the factory when a brand requests last-minute changes. You can also check out our guide on working with clothing manufacturers.
Seeing the process of apparel production will help you to understand it and set your expectations right. This will allow you to build a better relationship with the clothing manufacturers. On this topic you can check out our blog post on how to talk to clothing manufacturers when you found that right one.
Every design starts with a sketch, then a tech pack or CAD drawing. Luckily, we already completed our pre-production steps working with a lovely Designer and Tech Pack maker who sorted all this for us, helping transform an idea we had, to a very specifically looking technical drawing and a spec sheet. We then took the CADs to a Pattern Maker we knew and had patterns cut for us. We brought these to the manufacturer…
1. Patterns – Paper vs Digital
The clothing manufacturer noted straight away that for sampling and proper production our paper patterns would have to be digitised as some things are impossible to do by having only paper patterns. In the modern digital world having sewing patterns in a file rather than on paper only makes sense. The manufacturer’s pattern making specialist took our paper patterns and placed them on a large board, which is called the digitiser. It allowed the pattern maker to input the paper patterns into their own system, in our case the factory used the Assyst software. Each pattern part was paced around with a hand-held device that took a snapshot of the position of the pattern for each dot. They went all around the pattern piece until all information was collected and our pattern appeared in their software. This is a time-consuming process, as some garments have tens of panels. We were lucky as we only had a few.


2. Sorting out the patterns after digitising
The pattern maker noticed there were a couple of rough places and little imperfections which could be easily adjusted and fixed now that the pattern was in their system. Working with digital patterns allows the pattern maker to make alterations and changes with surgical precision. All measurement adjustments are visualised and tracked in real time. By the way, the same set of patterns would be used later to grade to other sizes if we approved the produced samples. Size grading is done using the same software.


3. Lay-plan: Getting patterns ready for production
The next step was to print out the patterns on a plotter. To do so the factory specialist had to prepare a proper lay-plan, which meant laying out all pattern blocks in a specific order (in our case sampling) taking into consideration things such as fabric length, roll width, the total number of items to be produced with a breakdown of sizes. As patterns were now in their system it was quickly done. The software used for the lay-plan then suggested the optimal layout of these geometrical shapes (patterns) for the quantities we had and other criteria to make the best use of the fabric and reduce fabric consumption. Although the software did this pretty well, there still was room for improvement.


A good specialist like the one we had could recognise this and improve the layout suggested by the professional software. The layout was moved around until the factory specialist knew the layout was absolutely perfect. We were told that an optimal fabric use efficiency is around 70-80%. With a higher variation of sizes and higher amounts of smaller pattern part details in production, the efficiency will always be higher.
Note that fabric consumption for a sample and for bulk production for the same item can greatly differ. Think of the good old Tetris, you are stacking shapes trying to avoid blanks and empty spaces.
4. Cutting the fabric
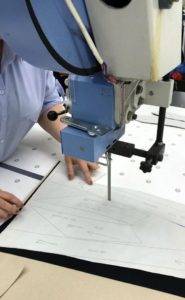
The plotter printed out our patterns from the pre-compiled lay-plan and workers were ready to cut our fabric. Patterns were printed on the special paper that stuck to the fabric seamlessly, so when the cutting was done nothing would slide. As the cutting began we noticed that the initial part was done manually with the scissors, but then the finer bits were trimmed with specialised equipment.

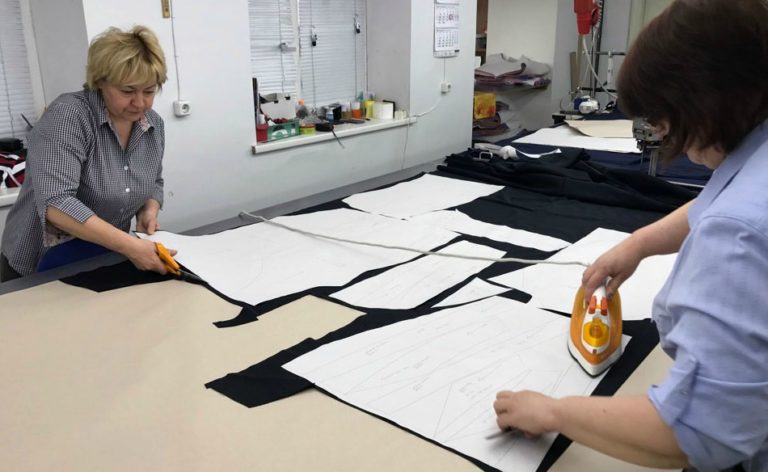
We were told that samples are often cut manually, whereas for bulk production the process is slightly different. The same types of fabric articles are layered on top of each other like a cake and cut in bulk. The garment manufacturer told us that composition and thickness of the fabric determines if it can be cut together. For example, cotton and viscose cannot be cut at the same time. Different fabrics react differently to cutting and can distort more than others, so the result will be uneven. This is why even if there is a 1% difference in composition a separate cutting job is needed. Looking around we noticed a lot of layered fabric already cut and ready to go. Well, back to our samples…
5. Making sets for the seamstresses
Once the cutting was completed all cut pieces were put together in sets. To optimise production similar operations were grouped so people could pick up speed doing the same thing over and over gradually saving time on production. Think of the way you brush your teeth every single day. By now you probably have a technique that made you more efficient at it.


6. Colours and Trims
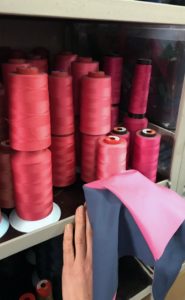
For production stage we were asked to select the right colour of the threads to match the colour of the fabric. With a little effort we managed to find the best matching colours. We were faced with a lot of options. Some had minimal differences and we have not even seen all the available shades.
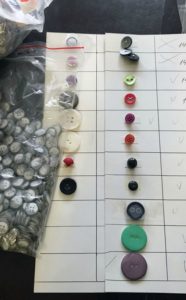
Trims were not required for these items except for elastics but we noticed a large selection of zips, buttons and other accessories offered by the fabric.

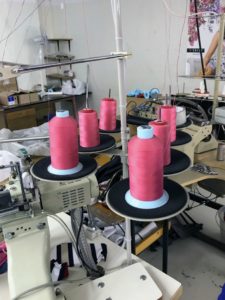
7. Adjusting the machinery
Our specialist had her set of cut fabric pieces and was ready to start sampling but she had to adjust the equipment first. Every sewing machine has to be adjusted for a specific type of fabric. She began unloading the old threads and putting in the new reels for our samples in the colour we chose. The seamstress took 6 reels of threads of the same colour as our garment and placed them in the flat-lock sewing machine. She then tested the seam on a piece of fabric to be sure the tension was set and adjusted properly.

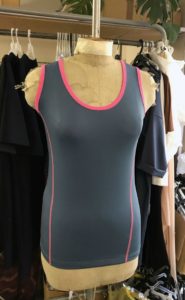
8. Finally, Sewing
Checking that everything was adjusted properly she began laying out the set and sewing together the pieces until we started to see our design finally coming to life. It was a truly exciting moment!


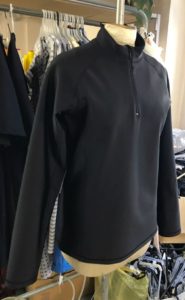
9. Finishing
Once the items were completed she took them to the sampling unit to check the measurements against our spec. Everything looked fine and after some thorough QC we tried on the samples, approved them for grading and went on to discuss the future bulk production order.
All in all, the whole process took us half a day. Do take into consideration that we were given dedicated people and sampling was reserved for us for the whole day. The team that we had contact with during the sampling stage was around 5-6 people and our sample went through 5 (!) different departments from pattern making, plotter layout specialists, components and trims to sampling and finally to quality control.
After we saw the enormous work that was done, we understood that as much as we wanted to rush things with a factory, it simply cannot be done in one hour. It requires preparation, adjustments and work of a dedicated team.
Clothing manufacturers rarely share this information or let people spend a day with them to observe the process. We felt we gained a much deeper understanding of the work they do and we are excited to share this information with you. I hope this article will be helpful to all those working with factories or just starting off to understand the production stages of sampling and appreciate that is it a precise and complex process, not a one minute job. If you are ready for production check our out guide on 10 mistakes to avoid when dealing with clothing manufacturers and get the ball rolling.